

How To Build Your Own Slatted Wood Wall Like A Pro
When it comes to interior design, a slatted wood wall can add a touch of elegance and flair.
But, if you’re not a professional contractor or builder, building your own slatted wood wall can seem daunting. Not to worry though! With these simple steps, you’ll be able to build your own artisan wall masterpiece.
So, whether you’re looking to add some extra personality to your living space or are just dreaming of having that Pinterest-worthy home office makeover, read on for how to build a slatted wood wall like a pro.
What You Need To Know Before Starting To Work On Your Slatted Wood Wall Panels
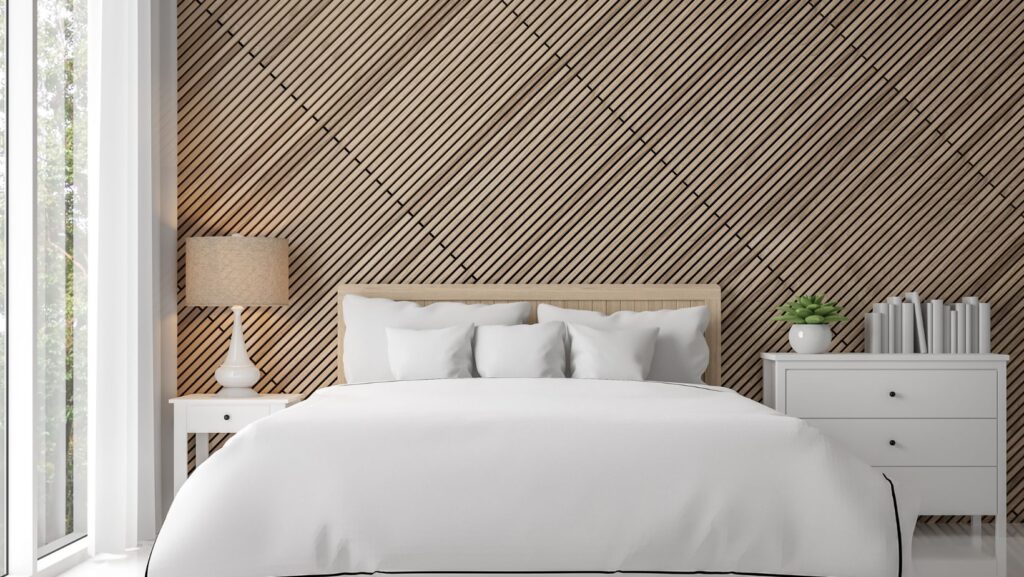
Slatted wood wall panels are a great way to add character and texture to your home. But before you start working on your project, there are a few things you need to know. First, it’s important to choose the right type of wood. Second, you’ll need to decide on the size and spacing of your wood slats. The size of the slats can have a big impact on the overall look of the wall. If the spaces between the slats are too wide, it can create a zebra-stripe effect that can be quite unflattering. On the other hand, if the spaces between the slats are too narrow, it can make your wall look cluttered and busy.
- A small tip: for a bold, contemporary style, go for a dark-colored background, such as charcoal or black. The color of the wall behind the slats is significant since it serves as the slats’ background.
8 Simple Steps For A Flawless Slatted Wood Wall
Step 1: Start by finding the perfect wall space. Selecting a spot that’s large enough to accommodate your desired design but not so big that it overwhelms your wallspace is an important first step in creating a perfect wood slat wall.
Step 2: Make sure you take the time to prep your walls before starting the installation process. Remove any existing nails or screws, and fill any holes or cracks with putty.
Step 3: Once you’ve selected and prepared the perfect spot, it’s time to start measuring. You’ll need to measure the width and height of your chosen wall space in order to determine how many slats you’ll need.
Step 4: Next, it’s time to select your wood slats. There are a variety of different woods to choose from, so be sure to pick something that fits your style and budget.
Some common choices include oak, cedar, redwood, chestnut and pine. Each has its own unique grain pattern and color, so take some time to look at samples before making your final decision. You’ll also want to consider the thickness of the slats. Thinner slats will be easier to work with, but they may not be as sturdy as thicker ones. Ultimately, it’s up to you to decide what’s best for your project. Just be sure to take all of the factors into account before making your final selection.
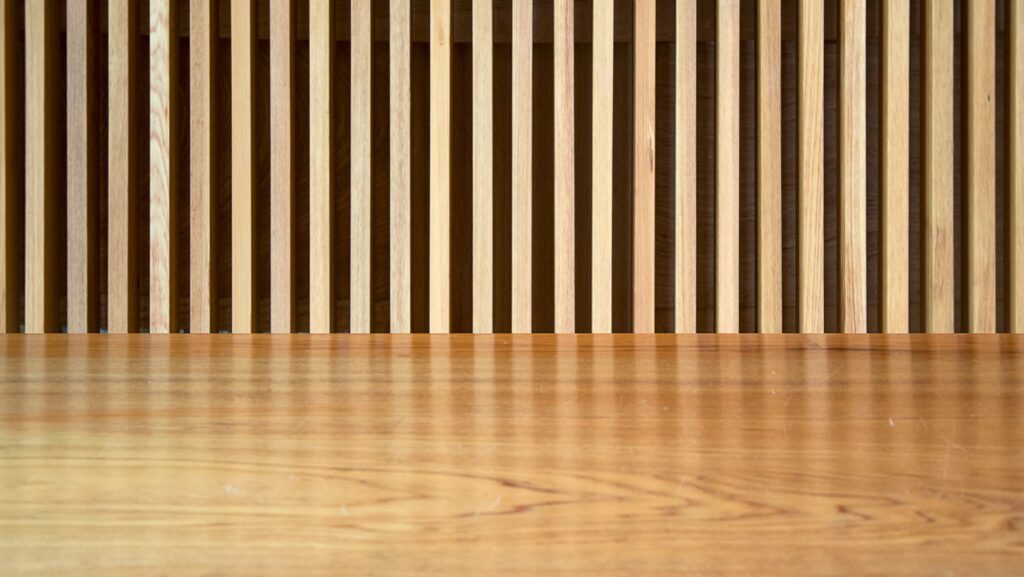
Step 5: Once you’ve selected your wood slats, it’s time to cut them to size. Depending on the width of your wall space, you may need to cut your slats down to fit. The best way to avoid unflattered patterns is to choose slats that are 1/2-inch wide and space them 1/4 inch apart (1). This will ensure that your wall has a clean, polished look that is sure to please.
- Tip: In order to avoid uneven cutting of the strip, check the width on a regular basis.
Step 6: Sand each wood slat individually, wearing thick gloves to protect your hands from the rough sandpaper. You must be careful not to damage the delicate surface of the wood. Plywood’s layered surfaces are difficult to sand neatly, so focus on the roughest spots on the slats. Use your palm to cup the sandpaper as you run it up and down the length of each slat.
Step 7: Once your slats are cut to size, it’s time to start assembling your slatted wood wall. On the backside of a slat, apply a drop of construction adhesive. Install the first wood slat in a corner. Use the level of your choice, level the boards vertically. Nail each board down while maintaining the spacing consistent across the wall by using one of the slats as a spacer for the subsequent slat. You can also use another kind of spacer to get your desired measurements.
Step 8: Once all of your slats are in place, use wood putty to fill in any nail holes before adding your finishing touches. You may want to add trim around the edges of your slatted wood wall or stain the slats in a color that fits your décor.
If you’re looking for even more ways to personalize your slatted accent wall, consider adding shelves or hanging photos from the slats. With a little bit of creativity, your slatted decorative wall can be truly one-of-a-kind.
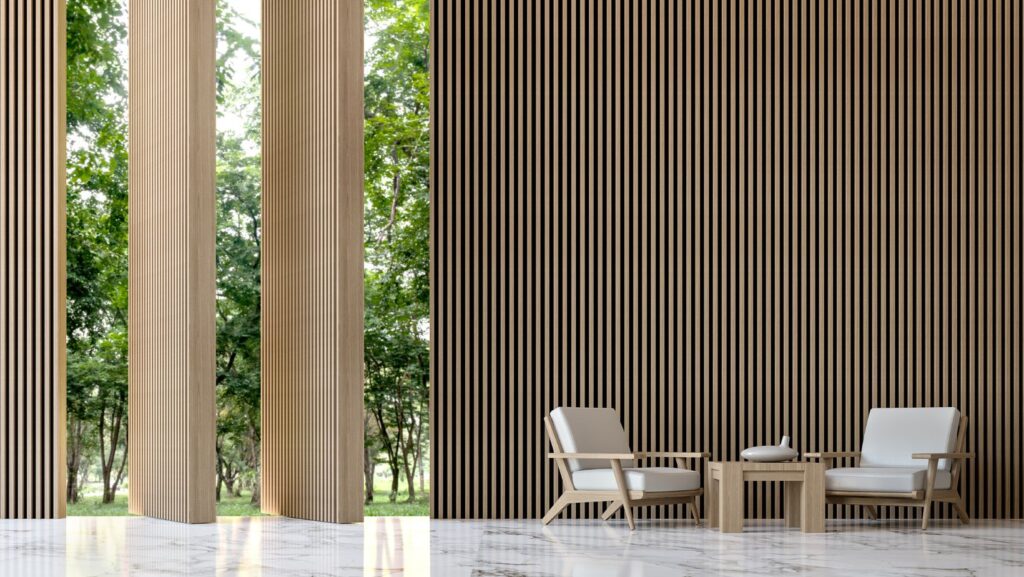
Vertical Or Horizontal, How To Choose The Right One?
Deciding between vertical and horizontal wood slat walls can be a difficult task. On the one hand, vertical wood slat walls create a more modern look that can add interest to a room. On the other hand, horizontal wood slat walls provide a more traditional look and can be easy to install. Ultimately, the best way to choose between vertical and horizontal slatted accent walls is to consider the overall style of the room and the amount of time and effort you are willing to put into installation. If you are looking for a quick and easy way to add interest to a room, then a horizontal slatted wood wall may be the best option. However, if you are willing to put in a bit more effort, then a vertical slatted wall can create a truly stunning focal point.
Now that you have all the tips and tricks for creating your own slatted wood wall, it’s time to get started on your project. Remember to take your time and plan everything out before starting to avoid any headaches down the road. If you need some help along the way or want a professional opinion, feel free to reach out to us for a free quote. We would be more than happy to walk you through the process and answer any questions you may have!
