Embrace the warmth of homemade breakfasts and the joy of shared moments with a DIY breakfast nook. Creating a cozy corner for your morning rituals not only adds charm to your home but also becomes a hub for family gatherings. In this guide, we’ll take you through the step-by-step process of building your own breakfast nook, infusing a touch of personality into your living space.
DIY Breakfast Nook
- Acquire or cut eight 5-foot-long two-by-fours. Utilize the remaining materials to create eight additional 18-inch-long two-by-fours.
- Construct the bench tops and bottoms by assembling the cut two-by-fours into four rectangles. Use the 5-foot pieces for the long sides and the 18-inch pieces for the shorter sides. Secure them together with screws.
- Proceed to build the vertical supports for the bench. Cut the two-by-fours into eight 18-inch-long sections and attach them to the inside half of the two rectangles. At this point, each bench should have a rectangle serving as the base, four inner vertical supports measuring 18 inches, and another rectangle positioned at the top, aligning flush with the tops of the vertical supports.
- Apply plywood facing to the benches by cutting two pieces measuring 5 feet by 18 inches and two additional square pieces measuring 18×18 inches. Affix the longer pieces to the fronts of the frames created in the previous step and attach the two side pieces to the left and right of each bench using nails.
- Connect the benches in an L shape and secure them by screwing them together from the inside using 3-inch screws.
- Give the benches a polished look by trimming the corners. Cut four 1x4s’, each measuring 18 inches long, and wrap two pieces around each corner. Nail them into place to finish the two outside edges of the seats made of rough plywood.

Steps to Complete Your Project
7. Begin fashioning the seat cushions for your benches. Cut a piece of plywood to match the top dimensions of one of the benches. Next, precisely cut the foam rubber to fit. Then, the polyester upholstery batting should be cut to accommodate the top, allowing an additional 2 inches to extend over the sides. Employ the batting as a guide to cut the cushion fabric. Wrap the foam rubber with batting, securing it to the bottom by stapling it in place. Proceed to envelop everything in the cushion fabric, once again stapling it securely at the bottom. Repeat this process for the second bench.
8. Take a sheet of veneer plywood and cut it in half using a table saw to make two 4ft by 4ft pieces. Apply wood glue evenly over the rough veneer faces, sandwich the two pieces together, and secure them by using 1-inch screws on one side.
Begin the Table
9. Initiate the construction of the table column by cutting four pieces of plywood, each measuring 30″ x 12″, at a 45-degree miter angle. Assemble these pieces to form the table’s column, ensuring to glue all edges together and reinforce the structure by using nails to secure them in place.
10. Begin assembling the table base by cutting two plywood pieces, each measuring 24 inches square, mirroring the dimensions of the tabletop. Apply glue evenly between them and secure one side with screws.
11. Locate the midpoint on the bottom of the tabletop and the top of the table base. Fashion two brackets from two-by-fours, customizing their size to match the inner dimensions of the table column. Affix these brackets to the underside of the tabletop and the upper surface of the base. Slide the column over each bracket and firmly secure it in place using screws or nails from the sides.
Add Final Touches
12. Elevate the visual appeal of your breakfast nook by staining or painting both the bench and the table. After achieving the desired finish, apply a protective layer of polyurethane coating to safeguard the wood surfaces from wear and tear. This final step not only enhances the longevity of your DIY creation but also adds a polished and durable finish to your charming breakfast nook.
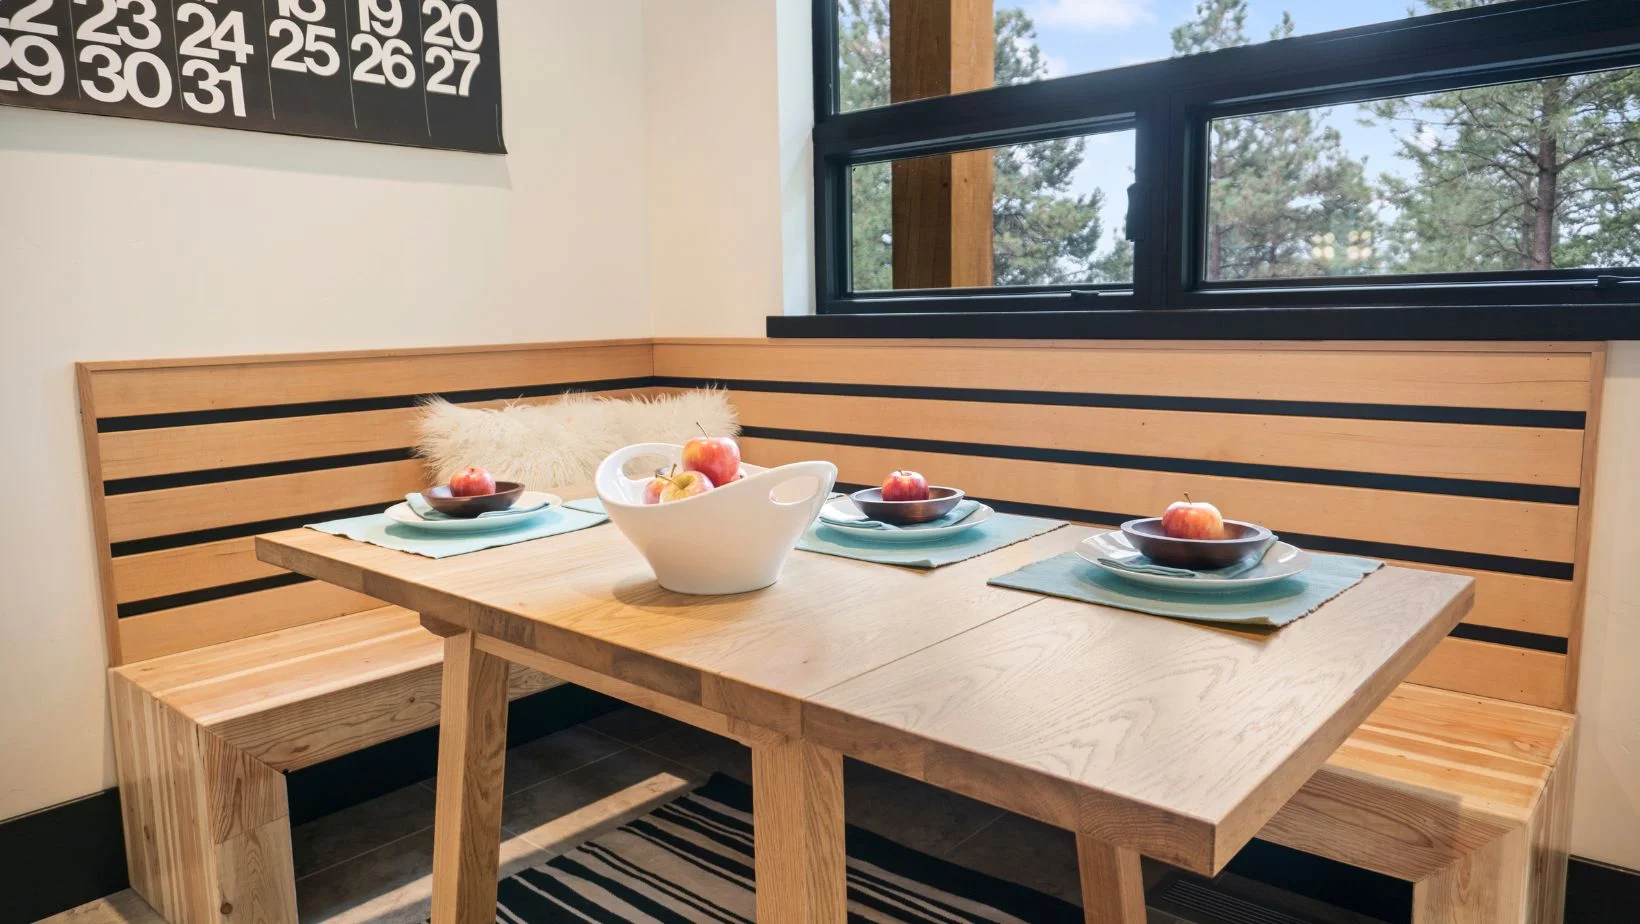
Building your own DIY breakfast nook is a rewarding endeavor that transforms a corner of your home into a haven of comfort and connection. Whether you’re sipping coffee alone or enjoying a family breakfast, your custom nook will undoubtedly become a cherished part of your daily routine.
