

The Insider’s Guide to Leveling a Floor Quickly and Easily
Table of Contents
When renovating a room in your home, it’s easy to overlook how much of an impact leveling the floor can have. Floor levelness affects almost everything from furniture placement and wall decoration to carpeting and other fixtures. Not only that, but uneven floors are also hazardous and can easily create unstable surfaces when walked on creating tripping hazards or worse. Fortunately, for those taking on their own renovations at home, leveling a floor doesn’t have to be difficult – provided you follow the right steps! In this blog post, we’ll provide the insider tips necessary for achieving perfectly leveled floors quickly and easily!
Understanding Your Subfloor: Concrete vs. Wood
When renovating a room in your home, it’s easy to overlook how much of an impact leveling the floor can have. Floor levelness affects almost everything from furniture placement and wall decoration to carpeting and other fixtures. Not only that, but uneven floors are also hazardous and can easily create unstable surfaces when walked on creating tripping hazards or worse. Fortunately, for those taking on their own renovations at home, leveling a floor doesn’t have to be difficult – provided you follow the right steps! In this blog post, we’ll provide the insider tips necessary for achieving perfectly leveled floors quickly and easily!
Concrete Subfloors
A concrete subfloor is composed of a solid base of concrete. Over time, it may develop high spots, cracks, or other uneven areas. To level a concrete floor, you’ll need to use a leveling compound designed specifically for concrete surfaces.
Wood Subfloors
Wood subfloors, on the other hand, are made up of floor joists covered by a wood or plywood layer. These floors can develop humps or dips over time as the wood expands, contracts, or degrades. To level a wood subfloor, you’ll need to address the underlying floor joists and secure loose boards before applying a leveling compound.
Step 1: Check the Floor Level
Before you start, you’ll need to get a sense of just how uneven your floor is. Using a long straightedge or a laser level, check for high spots, low spots, and any noticeable dips or humps. Mark these areas with chalk or masking tape so you can pinpoint where to focus your leveling efforts.
Step 2: Prepare the Floor
For concrete floors, you’ll need to first grind down any high spots using a concrete grinder. This will create concrete dust which can be hazardous to your health. Always wear proper safety gear such as a dust mask, goggles, and gloves when working with concrete dust.

Wood: Secure Loose Boards and Fix Floor Joists
For wood subfloors, check for any loose boards and secure them in place with screws or nails. If the unevenness is caused by sagging floor joists, you may need to install additional support or replace damaged joists. This step may require the help of a professional if you’re unfamiliar with the process.
Step 3: Apply the Leveling Compound
Now it’s time to apply the leveling compound. Follow the manufacturer’s instructions carefully and be prepared to work quickly as the compound can begin to harden in a short amount of time.
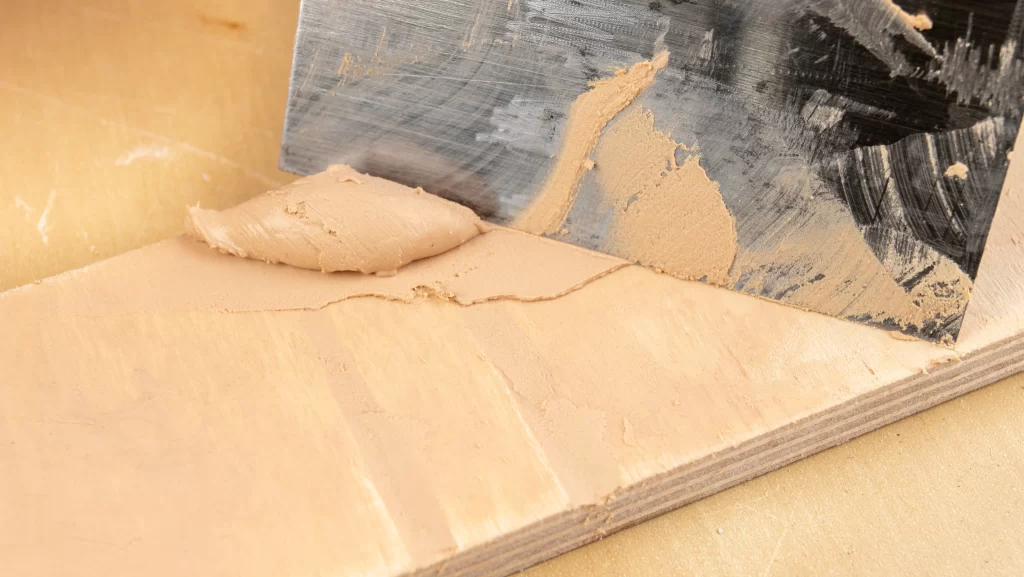
- Mix the leveling compound: According to the manufacturer’s instructions, mix the compound with water in a clean bucket. Be sure to mix thoroughly as uneven mixing can lead to an uneven application.
- Pour and spread the leveling compound: Start by pouring the compound along the edges of the room, then spread it evenly across the floor using a trowel or squeegee. Be sure to spread the compound evenly taking care to fill in low spots and eliminate high spots.
- Feather the edges: As you spread the leveling compound, feather the edges to ensure a smooth, even surface across the entire floor. Use a trowel or squeegee to create a seamless transition between the original floor and the applied compound.
- Allow it to dry: Give the leveling compound adequate time to dry, usually around 24 hours. Be sure not to walk on the surface during this time, as it can disrupt the leveling process and create imperfections.
Step 4: Clean Up any Dust and Debris
Once the leveling compound has dried and cured, you may find some concrete dust or residual debris on the surface. Vacuum the area thoroughly and mop the floor to ensure it’s clean and ready for the final flooring installation.
Leveling a floor can be an intimidating prospect, but as it turns out, it’s simpler than you might think. Don’t be afraid to roll up your sleeves and get the job done in a day. With a couple of simple tools, and a basic DIY know-how, you can take on any floor leveling project with confidence. Remember – always wear protective gear whenever necessary and take all safety precautions before starting any project. Once completed, you’ll have a level floor that will not only look better but may also help increase the value of your home over time.
